![]()
![]() R. Craig Collins >
Web Page Design >
Image Maps
R. Craig Collins >
Web Page Design >
Image Maps
Image Maps © R. Craig Collins, 2005/16
An image map is simply an image that can be used to link to different sites
by clicking on various areas of an image, called hot spots. The hot spots are
rectangles, circles, or polygons defined in HTML; the defined hot spots are then
associated with a web site as a link.
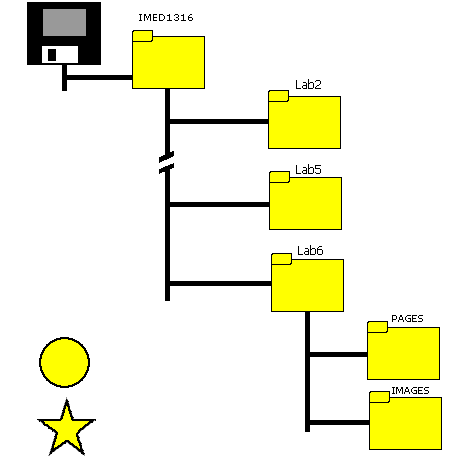
Float your mouse over the image one the left, note: only when you cross the rectangle floppy, the circle, or the star-like polygon, does the mouse change.
The image on the right just uses rectangles over the Discussions, Dropbox, and Quizzes.
|
• Using D2L Discussions • Using D2L dropbox • Using D2L Quizzes • Log in to D2L 
|
While, in theory, you can make an image map simply with a text editor, most people use their HTML editor or their graphics editor to not only define the hot spot, but also create the HTML code. Below are instructions for using an HTML editor or a graphics editor.
If you are using Dreamweaver, after inserting the image, select the image,
and you will activate the image map tools in the Properties area, at the bottom
of the screen.

Once you draw the hot spot, you will then get a new addition to the properties area, a place for the link and a place for the URL. That simple.
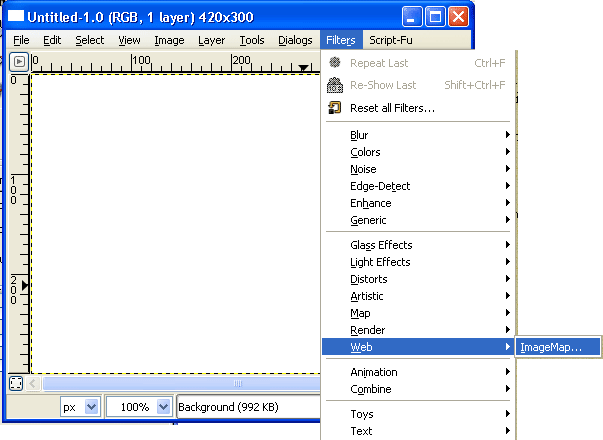
If using GIMP, start by opening an image, and then choosing Filters/Web menu, and select Image Map.
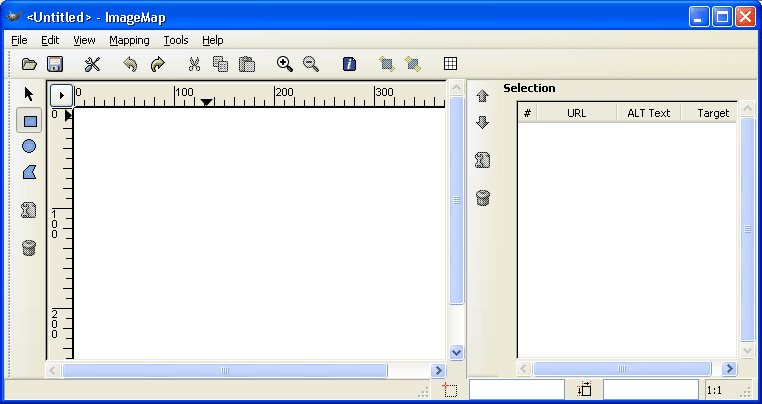
The Image Map window opens, allowing you to choose a hot spot shape to drag over parts of your image
As soon as an area has been defined, the Settings dialog appears. This is used to specify the hyper-link associated to the selected area.
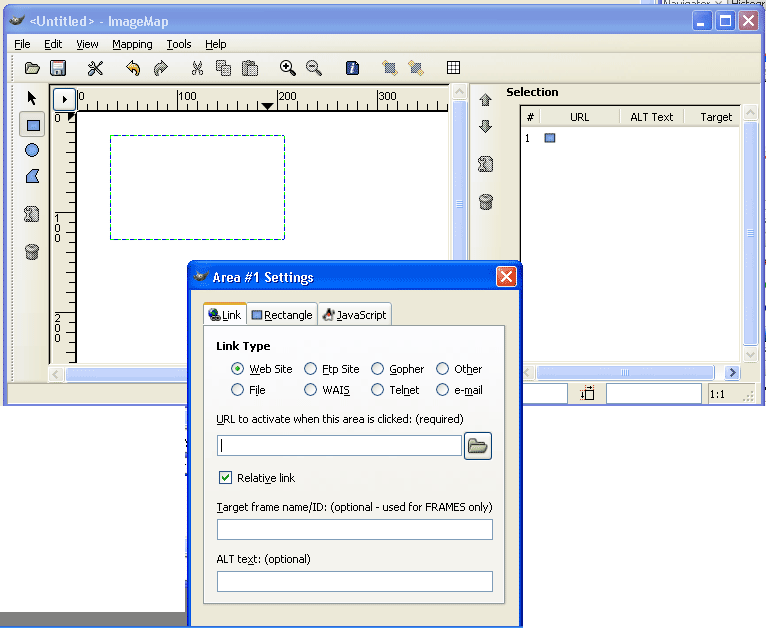
After all the desired areas have been selected and hyper-links defined, you can save the work by clicking on the disk icon or selecting the Save As function from the File menu.
This creates a web page with the image map information, so the file extension should be .html or .htm.
No changes are actually made to the image.
You can then copy and paste the relevant image map info into another web page, as you may choose to do in this week's lab.
You may also wish to read GIMP Savvy's Image Map Tutorial.
