![]()
![]() R. Craig Collins >
Web Page Design >
Intro to Dreamweaver
R. Craig Collins >
Web Page Design >
Intro to Dreamweaver
Intro to Dreamweaver © R. Craig Collins, 2009
Please refer to other documents within the Web Page Design area, for details on what Dreamweaver automates.
To begin with, after starting Dreamweaver, SAVE the file, such as O:\lab8\index.html. This must be done now, and after each major change to your page.
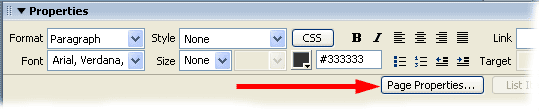
Next, click the Page Properties button at the bottom of the page. Note: what ever is selected has properties that can be modified at the bottom... notice the word processor type controls.
Next, on the Appearance menu, set your text color, background color, and browse to a background image you have created and save in a folder accessible to the web page, such as O:\lab8\images.
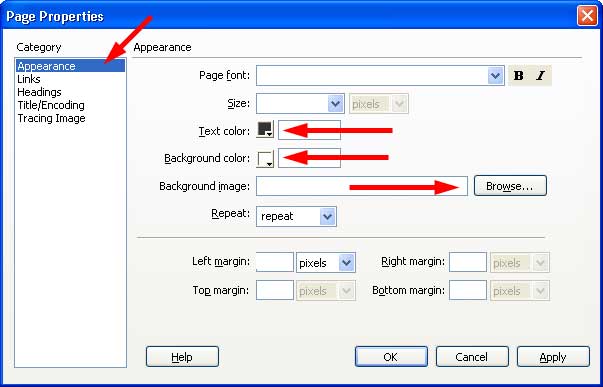
You may also look over some already created background image here, these must be saved in a folder that the web page can access, such as O:\lab8\images.
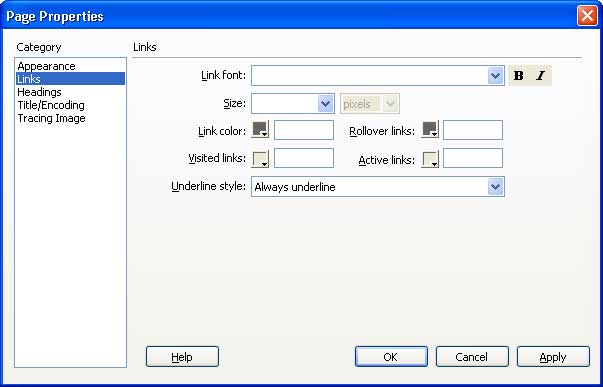
Now choose the links menu, and set the colors for the links... these should compliment the text color and background.
You may now save your changes by choosing [OK].
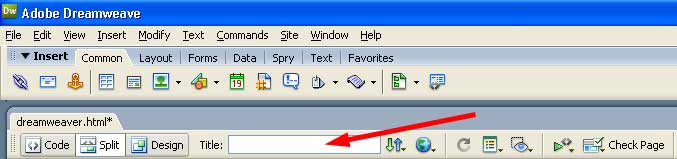
Next, you must set the title that you wish to display in the browser, above the main window.
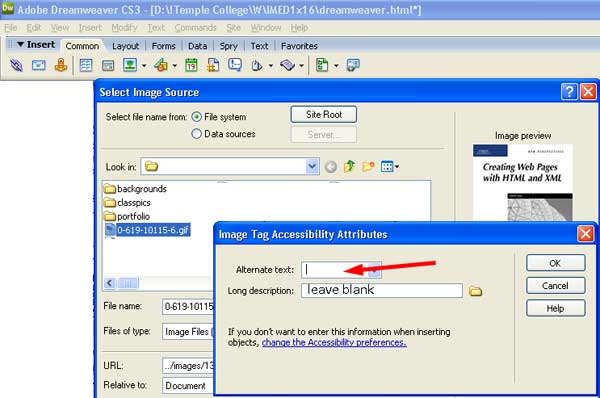
You may Insert images... after browsing to the file, you must provide Alternative text for the visually challenged.
As with a word processor, you may Insert a table to organize your page. (video on tables available)
Finally, to link to an Internet site, type some text, such as 'Click here for Temple College.'
Highlight the text, and choose the Chain icon.
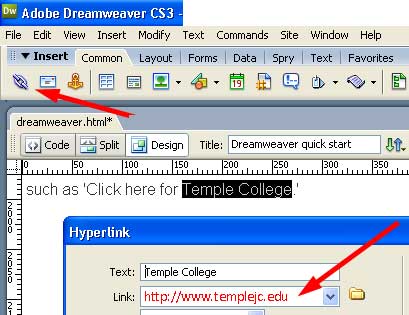
Only fill in a full URL for the link... leave other fields as is.
(Later, you will learn to link to your other local web pages.)