![]() R. Craig Collins >Common
> How To: PowerPoint (2007) II
R. Craig Collins >Common
> How To: PowerPoint (2007) II
How To: PowerPoint (Office 2007) II © R. Craig Collins, 2009
One of the most important timesavers in creating PowerPoint presentations is to build a Template. A template is a blank document that has all the formatting, and bells and whistles, already in the document... all you need to provide basically is the text.
One of the most important tasks after finishing your presentation is delivery method, whether the presentation is to be delivered live, at a kiosk, on-line, or in the form of handouts.
Building a Template
For this template, we will create a custom background that projects well in low light situations, has large, contrasting text with shadows, a logo that displays on each page, control of how the slides appear, and the use of progressive reveal... that is, controlling when text is displayed on a slide. We will use three functional areas of PowerPoint to accomplish this, the Slide Master, the Animation tab on the Ribbon, and the Slide Sorter View.
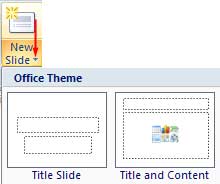
First, create a new presentation with a blank 'Title Slide,' and a blank 'title and content' slide.
 |
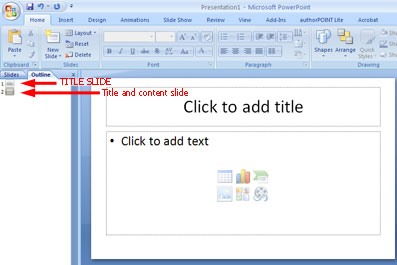 |
Make sure you are viewing the Title and content slide, not the Title slide.
Slide Master
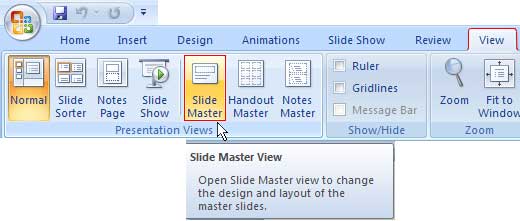
To open the Slide master, choose the View tab, the select Slide Master.
Highlight the 'Master title' text, switch to the Home tab, and then use the 'Increase font size' [A^] tool one or two times...
I even make the text [B]old, and add the [S]hadow.
In a few moments, I'll follow the recommendations of my PowerPoint tips lecture to have a dark background, so while I am here, I will also make a light, contrasting text color, so I'll set the text color to yellow.
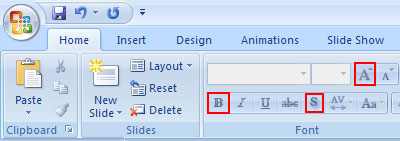
...The title should now be 48 points or so; now move on and select the 'Master text' styles, as shown below.

Again, use the 'Increase font size' [A^] tool one or two times...
I even make the text [B]old, and add the [S]hadow.
In a few moments, I'll follow the recommendations of my PowerPoint tips lecture to have a dark background, so while I am here, I will also make a light, contrasting text color, so I'll set the text color to yellow...
...when finished the level one text is around 44, and the level 5 text is around 28.
You should select the Title slide master, and do similar formatting.
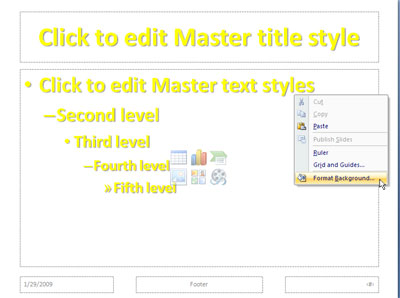
As discussed in PowerPoint tips, a good background should be dark with contrasting, light text, and have some visual interest.
Right click the background of the slide master (do not click on a text box) and choose Format Background...
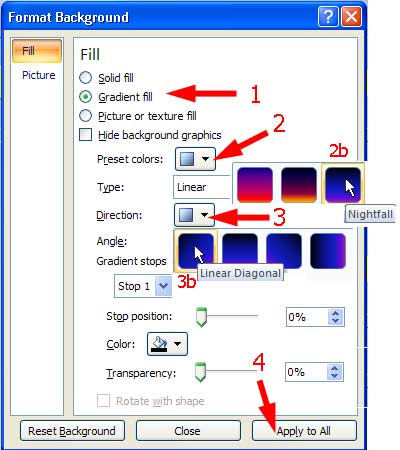 |
To Format the Background 1) Select Gradient Fill, 2) then choose the triangle next to Preset Colors, and 2b) Choose Nightfall. 3) Select the triangle next to Direction 3b) Choose Linear Diagonal 4) Choose Apply to all, then close. |
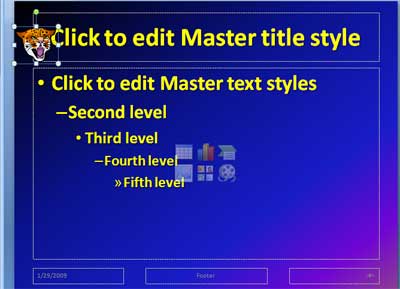
While we are still on the Slide Master, let's add a
persistent logo... an image that will appear on every page.
From the Insert tab, choose to insert your picture or clip are. You may click the white dots at the corners (drag handles) to resize the image, or click in the middle to move it, perhaps the upper left hand or lower right hand corner.
Select the Slide Master tab, and click the red X above Close Master view.
Slide sorter view
For the next item, we need to be at the slide sorter view.
At the lower right hand corner of the PowerPoint window, choose the button that looks like four squares.
![]()
From here, you can drag to rearrange your slides, right click a slide to hide or unhide it, or add a transition.
A Transition is how the slide appears.
Drag your mouse to highlight all of your slides, and then choose the Animations tab. Select the Fade Smoothly Transition.
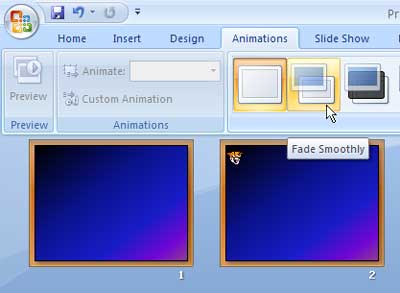
Now each slide will fade in, as you advance your presentation.
Custom Animation
ustom animation is how the WORDs appear (transition is how the slide appears).To begin, choose normal view. It is the button to the left of the slide sorter button.
![]()
Make sure your second slide is selected, and click the text place holder.

Now choose
Delivering your presentation
Live presentation
Kiosk Options, Timed presentations
Web Delivery with Flash Options, iSpring free
Handout deliver with pdf options
CutePDF
Microsoft PDF
Adobe Acrobat Pro