![]()
![]() R. Craig Collins >
Intro to Computer Graphics > Resizing Images
R. Craig Collins >
Intro to Computer Graphics > Resizing Images
Resizing Images © R. Craig Collins, 2008
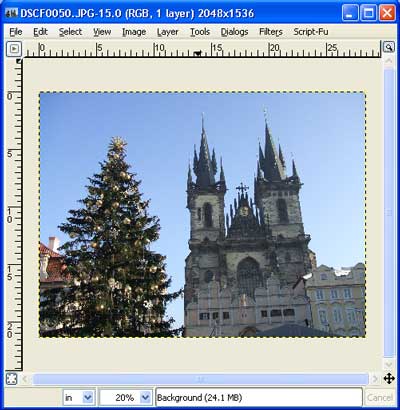
Many times a digital camera's image is 28.44x21.33 inches, or 2048x1536 pixels (1.33:1). This is far larger than any web browser can display, and larger than most frames you have around the house, if you were to print it. The reasoning behind this is to capture the best quality image to start with, and adjust it later; that adjustment often is to resize the image. Below is an image of the New Town Square in Prague. Note the zoom is 20%, in order to see the entire image, which is more than 28x21.
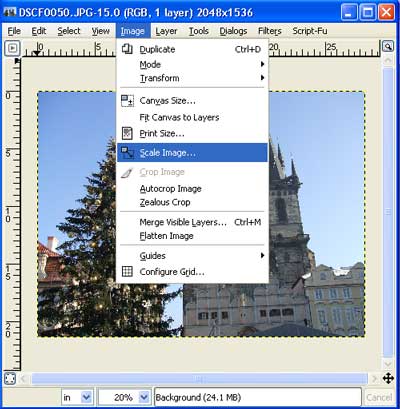
To change the dimensions, use Image\Scale Image...
The Scale Image dialog box is below.
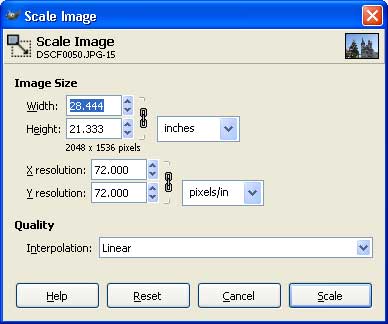
Note: Typically, resizing keeps the same aspect ratio, proportionally reducing both the width and the height. The chain symbol means if you change one value, the other will be changed to match proportionally, just by pressing the tab key. If you wish to change the aspect ratio without distorting the image, see the discussion on cropping.
One nice feature is the ability to change resolution here, also. While making images larger tends to destroy the clarity, scaling smaller can be accompanied by increasing the resolution, to better keep clarity. Again, changing a chained value will keep the change proportional.
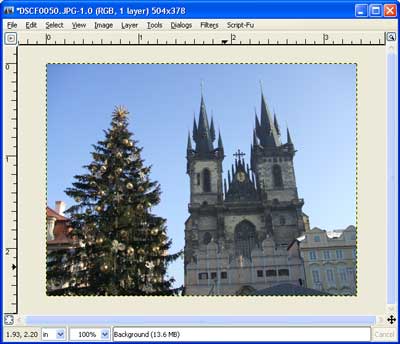
Below is the image scaled to about 3.5x2.5 inches, and the resolution has been doubled to 150 dpi.
Note that the image is now being displayed at 100%
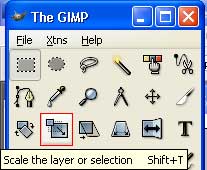
Scaling with the Toolbar
As mentioned previously, it is preferable to use File\Save As and create a new file, instead of replacing the original.
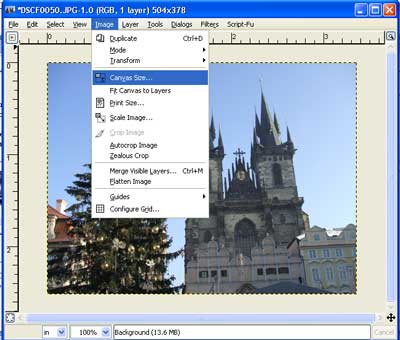
Canvas Size
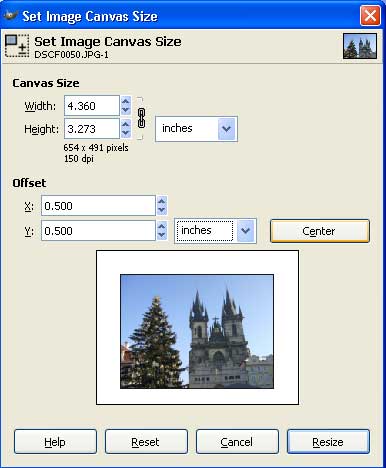
There is one other trick that can be done, and that is to adjust the canvas size. Typically one makes the canvas larger than the image; one reason to do this might be to put a white border all the way around the image, or add space at the bottom, to make space for text to be added later. This is done from the Image\Canvas Size...
The resulting dialog box.
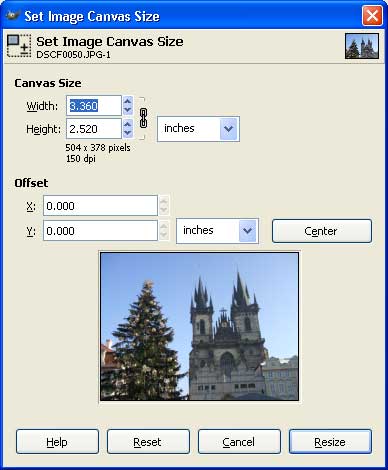
The offset is used to control where the extra space is added. Note that by adding one inch to the width would put space to the right and bottom, if no offset was used. You may also click the [Center] button. If you do NOT want to keep the same aspect ratio, unclick the chain link.
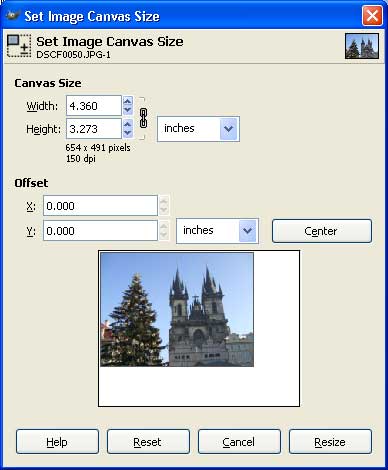
Below, .5 inches was manually added, and the resize button was clicked; note, we could also have used [Center] to get it exactly in the middle.
If you click the Chain icon, you can change the items individually, if you leave the chain icon it will change in proportion, keeping the aspect ratio.
Note: in the GIMP, on occasion, when resizing the canvas, you must choose Layer\Layer to Image Size in order to use the entire Canvas.
Much more about how to really use layers is coming in Overview 11...
As mentioned previously, it is preferable to use File\Save As and create a new file, instead of replacing the original.
By right clicking the following link, you can save my Newgrange, Ireland image, to practice on, if you like.