![]()
![]() R. Craig Collins >
Intro to Computer Graphics > Cropping Images
R. Craig Collins >
Intro to Computer Graphics > Cropping Images
Cropping Images © R. Craig Collins, 2008
Many people consider photo manipulation to be cheating, such as some how putting the President next to a space alien in the National Enquirer... but, cropping is not only permissible, but often is a recommended method used to improve an image.
In the last overview, you viewed an image, and then you viewed a portion of the original image; when you select an area and remove everything else, it is called cropping. So cropping could be like cutting coupons out of the newspaper... you only need the coupon so you remove everything else that is on the page. But there is a little more to it than that.
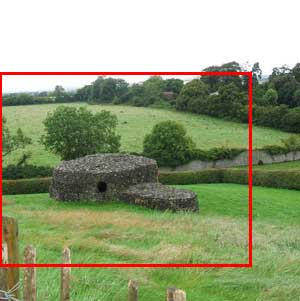
Notice in the example below, that not only can unwanted areas be removed, but cropping can also center an image, or change the aspect ratio.
  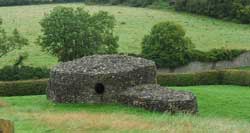 |
The original aspect ratio was about 300x300 or 1:1, the final cropped image's aspect ratio is 250x133, or about 2:1. That means if you have an image that doesn't fit in a frame because one of the side measurements is too long, you could 'trim' the image to fit. This is also often done to make wide screen images fit on older TVs or computer monitors, or to make a better fit for photos on a web page or in a book. Even new HT monitors aren't the same aspect ration of some movies, so black bars are often added to the movie to fill in the missing space if they don't want to cut out part of the image.
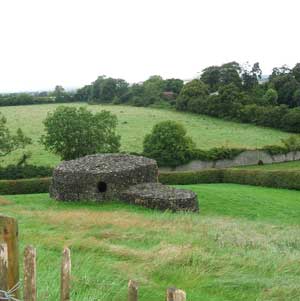
But typically, cropping is to emphasize something... to accentuate the subject matter. In the image of Newgrange, Ireland, above, the audience may be looking at the trees instead of the burial mound, or they might be distracted by the picket fence... cropping draws the focus to what the photographer wants the audience to see.
How to crop, using the GIMP
After opening the image, the image may not easily display in the image window, or you may wish to display inches instead of pixels on the rulers around image. To change these, you may use the controls below the image.
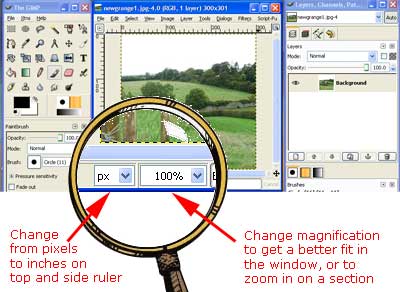
For more granular control of the image size, choose on the image window, View\Zoom\Other...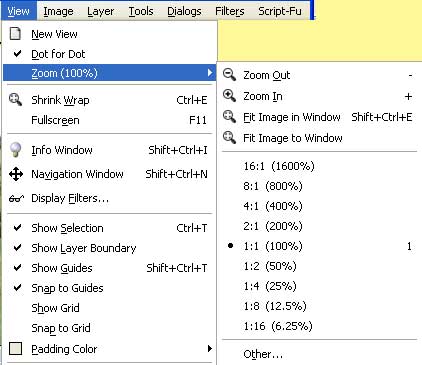
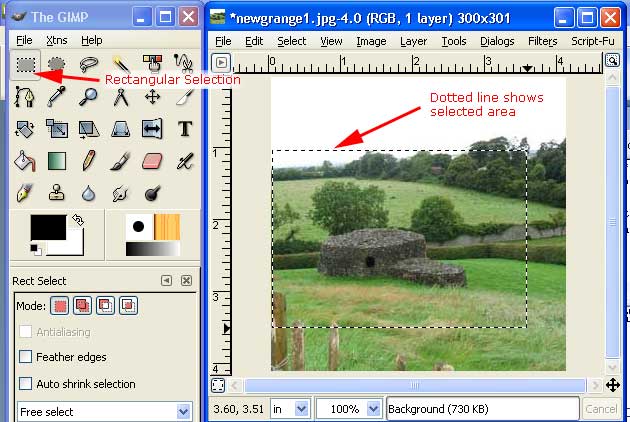
To crop, first choose the select rectangular regions button. Now, to use the selection tool, click and drag across the image; I prefer to go from top left to bottom right, but it doesn't really matter. Once the selection is created, let go of the mouse.
Note: If the dashed line that marks the selection is not quite right, do not click in the selection with your mouse and try to drag it; this moves the selected area of the image. If the dimensions are wrong, click someplace else, and try again. Don't forget, [Ctrl]+[z] is undo, and will put it back the way it was.
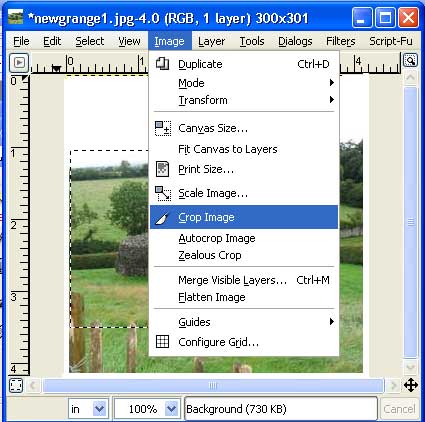
Once the item is properly selected, choose Image\Crop
Note: It is recommended that you use File\Save As to create a new file, rather than replacing the old file.
By right clicking the following link, you can save my Newgrange, Ireland image, to practice on, if you like.
If you file doesn't need cropping, or if after cropping is still the wrong size for your use, you may resize the file.