![]()
![]() R. Craig Collins >
Intro to Computer Graphics >Intro to Layers
R. Craig Collins >
Intro to Computer Graphics >Intro to Layers
Intro to Layers © R. Craig Collins, 2008
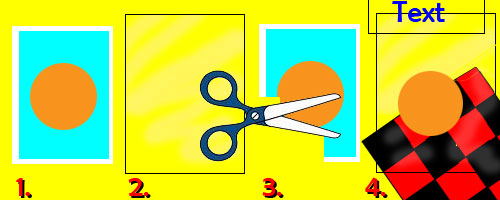
As discussed earlier when creating transparency, some digital editing tools use layers.
One kind of layer is like taking a piece of clear plastic and placing within your photograph.
Using a digital image editor, many times when you paste one image onto another, a layer is created to hold the new part of the image.
NOTE: Layers are typically only used while editing with your computer graphics software... the various layers must be combined into one layer when saving as a png, jpg, or gif. This is often called flattening, or merging layers.
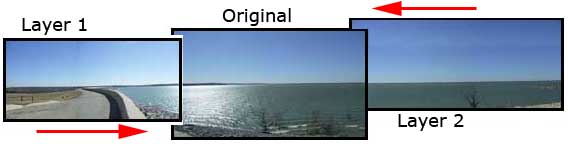
Say we had three images of Lake Waco we wished to combine.

We could open the middle image, expand the canvas size, then copy and Paste the other two graphics into the image.
In the GIMP, on occasion, when resizing the canvas, you must choose Layer\Layer to Image Size in order to use the entire Canvas.
When pasting, you may wish to anchor a floating layer into the existing layer, using Layer\Anchor Layer.
Or you could use Paste Into to drop the copied item directly into the existing layer.
Later on, you'll see that the images should each be on separate layers, allowing us to move them around until everything lined up... so instead of anchoring the layer, you could use Edit/Paste As and choose New Layer... then we can move the items on different layers independently. You just need to make sure you have selected the proper layer in the Layers, Paths, and History dock, which normally opens on the right of the desktop.
We might need to crop parts of the image out, adjust the brightness and contrast, etc., then we could merge or flatten the image, to get it ready for printing or using on the web.
In the GIMP to flatten you can choose Layer\Merge Down.
Again, in the GIMP, on occasion, when resizing the canvas, you must choose Layer\Layer to Image Size in order to use the entire Canvas.
Much more about how to really use layers is coming in Overview 11...
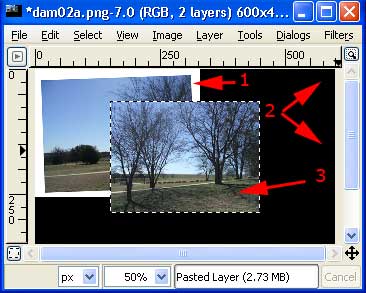
Below is a window from the GIMP.
1. is the original image
2. is the new, larger canvas (shown in black for emphasis; the entire resized campus is called the background)
3) is an image that has been pasted in on a new layer, which can be moved anywhere on the new canvas,
floating OVER the background.
 |
The Layers, Channels, and Paths dock, normally on the right side of the desktop, is where you select which layer you are working on |
In the GIMP, on occasion, when resizing the canvas, you must choose Layer\Layer to Image Size in order to use the entire Canvas.
Much more about how to really use layers is coming in Overview 11...