![]()
![]() R. Craig Collins >
Intro to Computer Graphics >
Lab 10, Capstone Help
R. Craig Collins >
Intro to Computer Graphics >
Lab 10, Capstone Help
Lab 10 Help © R. Craig Collins, 2011
The first thing to do in lab 10 is to come up with a plan.
My idea is to make a small poster to show off some of the pictures I took when I went to Zürich.
I know that the lab states that I will need to
• make some shapes
• add some digital images, using transparency
• follow copyright law, and only use my material, or have written permission to use other people's material
• edit the images as needed
• add some text, including my name,
• save my work in an xcf file to maintain layers, transparency, and text
• save my work in a high quality, printable, png
• save my work in an optimized, web quality jpg
• keep track of what I did in a Word or rtf document
Steps to follow, click link for more details
Note to self, make sure I finish early, so I can turn it in and get feedback, and resubmit if needed.
(No way can you turn this one in late.)
Job 1 Make some shapes, using Inkscape, Paint, or GIMP. (Record what I did in my documentation)
Job 2 Import the shapes into GIMP (Record what I did in my documentation)
Job 3 Save my working copy as an xcf
Job 4 Add transparent layers with digital images, anchor layers and size layers to image size, as needed (Record what I did in my documentation)
Job 5 Rotate, crop, arrange images as needed
(Record what I did in my documentation)
Job 6 Add some text, including my name (Record what I did in my documentation)
Job 7 Adjust the image, as needed (brightness, contrast, color balance) (Record what I did in my documentation)
Job 8 Save the completed work as an xcf, yourname-lab10.xcf
Job 9 Save the work in a high quality, printable, yourname-lab10.png
Job 10 Save the work in an optimized, web quality yourname-lab10.jpg
Job 11 Save the documentation as yourname-lab10.docx, or doc, or rtf
Job 12 Decide if I want to do some bonus work (See lab 10)
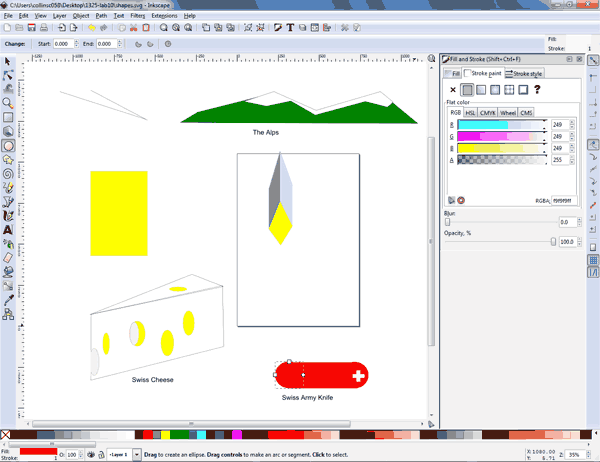
Job 1 Illustrated: Make some shapes, using Inkscape, Paint, or GIMP.
As my theme is Swiss, I will make a Swiss Army knife, some swiss cheese, and the Swiss Alps.

The knife was easy, two red disks, a red cylinder, then two white lines.
I tried the cheese two ways, the cube, and just drawing straight lines. Then I added ovals, and used the fill tool.
The mountains were just a series of jagged lines, flooded.
(Record what I did in my documentation)
Back to List of steps
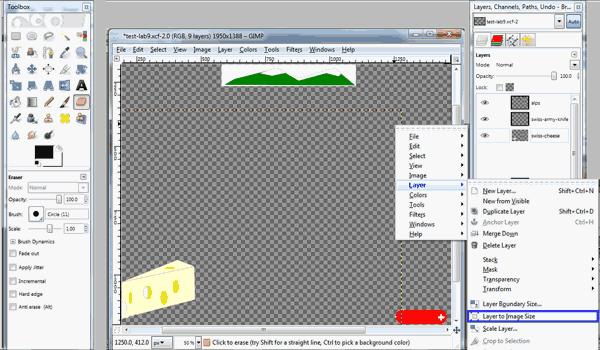
Job 2 Illustrated: Import the shapes into GIMP
Gimp can open an SVG file, or a paint BMP, the SVG will be rasterized
during the import process.
I then copied the layer three times, selected the individual items, used Select/Invert and then deleted everything but the items, one per layer.
I right clicked the layer, and renamed each to a meaningful name. I move the objects to where I thought they needed to be, and made sure the layer was the size of the canvas
 .
.
(Record what I did in my documentation)
Back to List of steps
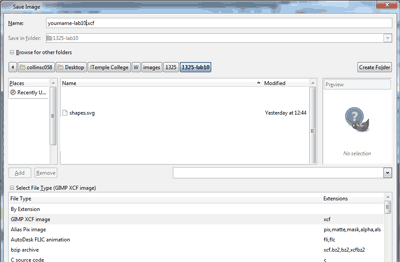
Job 3 Illustrated: Save my working copy as an xcf
Make sure you choose File/Save As and choose the xcf file type

(Record what I did in my documentation)
Back to List of steps
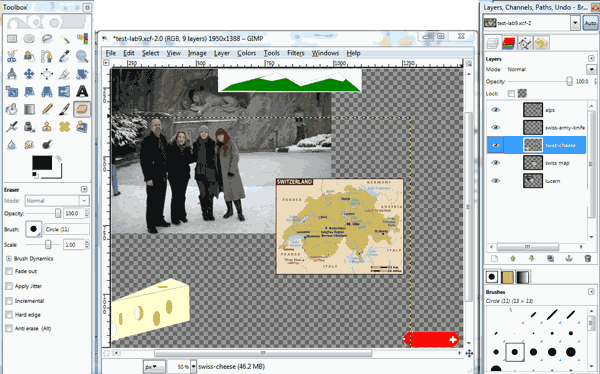
Job 4 Illustrated: Add transparent layers with digital images, anchor layers and size layers to image size, as needed

(Record what I did in my documentation)
Back to List of steps
Job 5 Illustrated: Rotate, crop, arrange images as needed
See Class overviews for these items
(Record what I did in my documentation)
Back to List of steps
Job 6 Illustrated: Add some text, including my name

(Record what I did in my documentation)
Back to List of steps
Job 7 Illustrated: Adjust the image, as needed (brightness, contrast, color balance)
See Class overviews for these items
(Record what I did in my documentation)
Back to List of steps
Obviously, more will be needed than what I am showing
Job 8 Illustrated: Save the completed work as an xcf, yourname-lab10.xcf
Back to List of steps
Job 9
Illustrated: Save the work in a high quality, printable, yourname-lab10.png

(Record what I did in my documentation)
Back to List of steps
Job 10 Illustrated: Save the work in an optimized, web quality yourname-lab10.jpg
See the Optimize web page
(Record what I did in my documentation)
Back to List of steps
Job 11 Illustrated: Save the documentation as yourname-lab10.docx, or doc, or rtf
Back to List of steps
Job 12 Illustrated: Decide if I want to do some bonus work (See lab 10)
See Overview 13 and Overview 14
Back to List of steps