![]()
![]() R. Craig Collins >
Intro to Computer Graphics >
Like ARTC Lab
R. Craig Collins >
Intro to Computer Graphics >
Like ARTC Lab
Like ARTC Lab © R. Craig Collins, 2007
A video of the Method One portion of the activity is also available, but read over the steps first.
As mentioned previously, there are two ways to make a file with transparency. Mark an area or color, and tell the computer to ignore that area or color (required for lab 3) , or method two, add a transparent layer, and cut out the parts you don't wish to see (will be covered in detail later in the semester).
Method One: Tell the computer which area to ignore, which makes part of the image transparent.
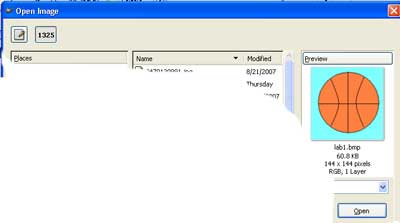
1. Open the image, lab1.bmp, using the GIMP software
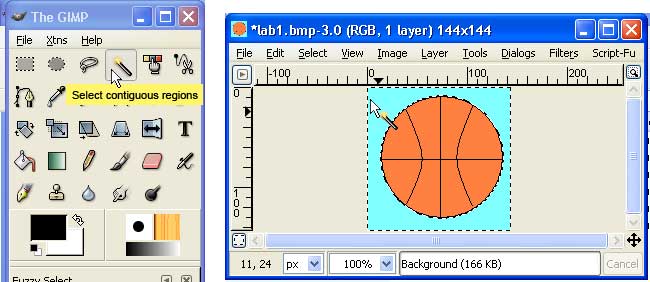
2. Choose the 'Select contiguous regions' tool, and click the blue background.
This selects the area that we want to eventually tell the computer to ignore, allowing transparency.
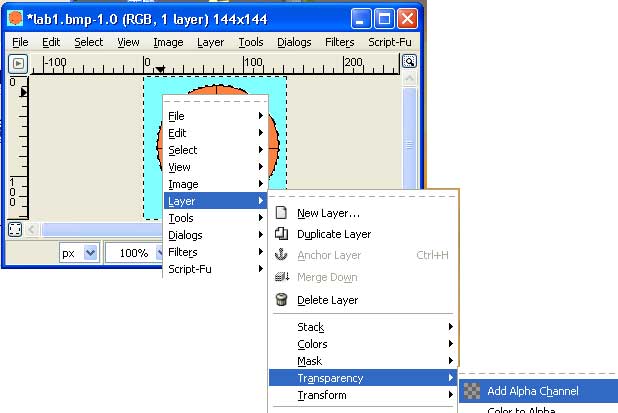
3. Right click the selected blue area, then choose Layer\Transparency\Add Alpha Channel.
(You can also select the Layer menu, then choose Transparency\Add Alpha Channel)
The Alpha channel will be covered more later, but for now, just associate Alpha Channel with the green screen the weather man stands in front of... it will be removed by the computer.
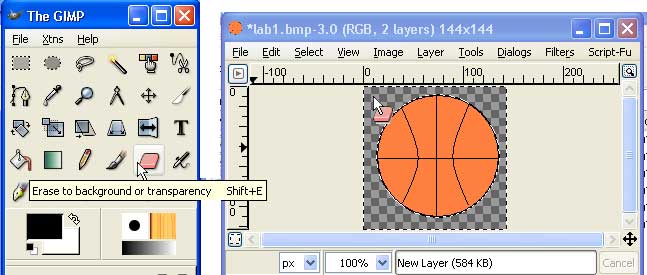
The Alpha Channel looks like a gray checkerboard... that is how the GIMP software shows transparency
4. Select the Eraser tool, which can now be used to erase the blue, leaving the gray checkerboard that indicates transparency
5. Now to save the file, using File\Save As...
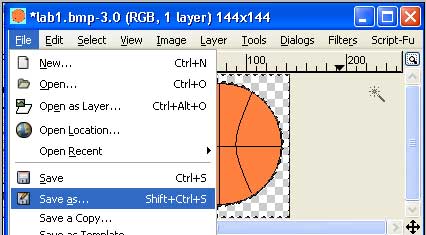
6. Choose the gif file type

7. The GIMP software warns that the file must be exported, a step to convert the information to meet the 256 color limit
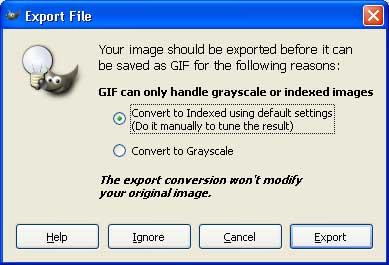
8. You may leave a comment, this will not display.

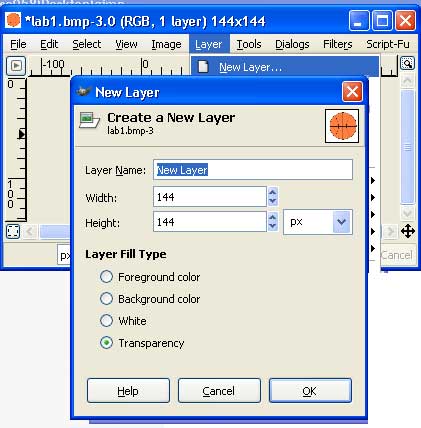
Method Two, adding a transparent layer.
Transparent layers will be covered in detail later, this is just for background
Open the file, lab1.bmp
Using the Layer menu, choose New Layer, and set it to transparency
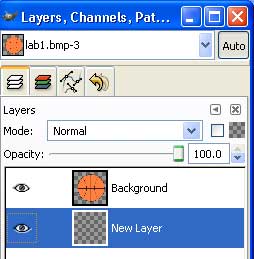
Rearrange the layers so the transparent layer is below the old background layer, with the ball.
There is a trick to this, it will be covered later... again, this is just for background
Choose the 'Select contiguous regions' tool, and click on the blue background
Use the Eraser tool to remove the blue background, leaving the transparent layer behind it
From here, saving the file is identical t the process mentioned above
A video
of the Method One portion of the activity is also available