![]()
![]() R. Craig Collins >
Intro to Computer Graphics >
Like ARTC Lab 1
R. Craig Collins >
Intro to Computer Graphics >
Like ARTC Lab 1
Like ARTC Lab 1 © R. Craig Collins, 2007
Controlling file names
Creating the Paint file
Zipping the project
A video of the Paint portion of the activity is also available, but read over the steps first.
If you are using Windows 7, review the steps below, then read over Comparing Windows 7 Paint, and previous versions
Before you begin, make sure you see the entire filename
Controlling File Names
Many Windows computers are set up to hide known file extensions; this can be very confusing
for computer students. To set your computer to display the entire file name:
• Open My Computer or Windows Explorer
• Choose Tools\Folder Options... (for Vista users, press the [Alt] key to reveal the Tools menu), then select Folder Options)

• Choose the View tab
• Click off the check mark next to 'Hide extensions
for know file types'
• Click OK

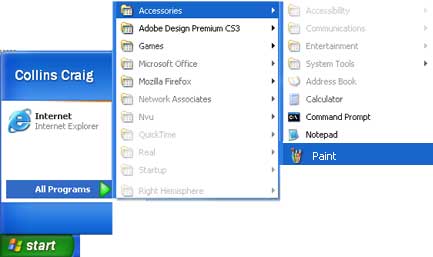
Starting Paint
Normally, this is found using Start/All Programs/Accessories/Paint
Windows XP/Vista version of Paint
Below is a list of the tools
Note: the Options part of the window changes, depending on what tool is selected.
To select the foreground color, click the pallete
To select the background color, right click the pallete
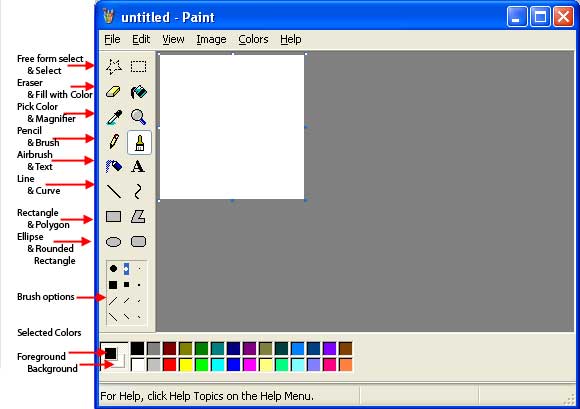
Experiment with all of the tools and options before beginning the lab.
Create a folder named lab1. You will be saving the Paint file in this folder.
For the lab, begin by setting the size of the image.
This can be measured in pixel, inches, etc. We will use pixels. Many times the screen resolutions is between 72 and 96 dpi, so and image 144 pixels by 144 pixels would be about 2 inches square.


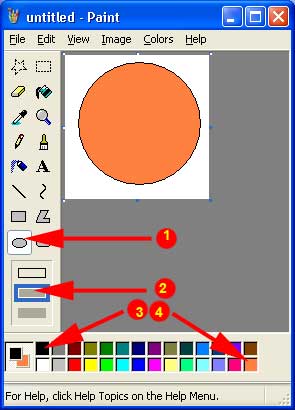
To get a round shape that has a black outline and an orange interior:
1) Choose the Ellipse tool
2) In the options area, choose the middle box.
This will use the foreground color for the outside, and the background color for the inside.
(The top option would be just the black outline, the bottom option would be a solid color)
3) Choose black as the foreground color by clicking the black square on the pallete.
4) Choose orange as the background color by RIGHT clicking the orange square on the pallete.
5) Click the left mouse button and dragthe mouse to form the oval.
Tip: to make it perfectly round, hold down the Shift key as you drag the mouse.
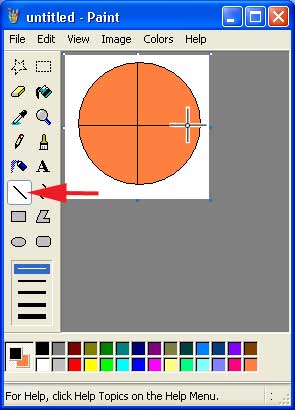
Now choose the Line tool and draw the vertical and horizontal lines by dragging the mouse
Tip: to make the lines perfectly straight, hold down the Shift key as you drag the mouse
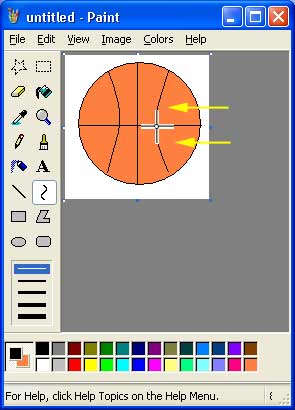
Now, choose the Curve tool.
Draw a straight line to the left of your vertical line
Click in the middle of the new line, and drag it toward the vertical line to curve it.
IMPORTANT: to lock in the new shape, click on some other tool, like the selection tool.
Now, choose the Curve tool again.
Draw a straight line to the right of your vertical line
Click in the middle of the new line, and drag it toward the vertical line to curve it.
IMPORTANT: to lock in the new shape, click on some other tool, like the selection tool.
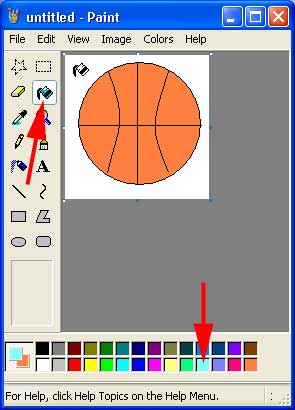
Now, to fill the white canvas with a different color.
The Fill With Color tool will flood a connected area with the color you choose
Note: if there is any gap in any lines or circles, the Fill With Color tool will replace the old color
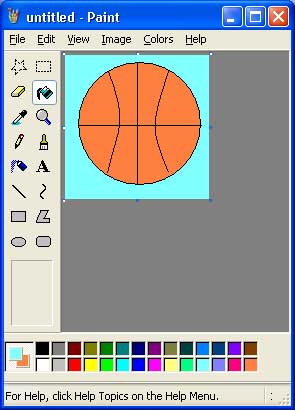
The final product should look something like this:
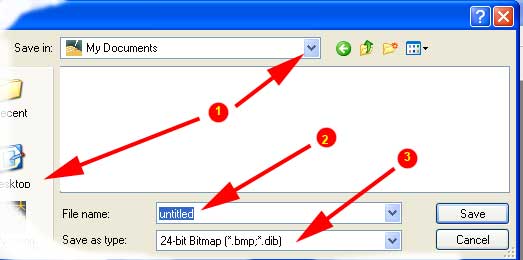
Now, to save our masterpiece.
Since this is a new file, we will use File/Save As
(File/Save is used when you change an existing file)
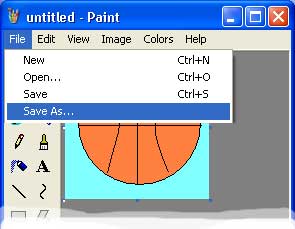
1) Choose where you want to save your image (lab1 folder)
2) Choose the name you wish to use (ball.bmp)
3) For ARTC 1325 lab 1, make sure it will be saved as default type Bitmap... this will add .bmp to the filename
Other options, for different applications, include .gif (which can be animated) and .jpg
(these are covered later)
Once you choose Save, you'll see the name of your image on the title bar.
A video of the Paint portion of the activity is also available
Windows 7 Version, click here for differences in layout
To Zip: Using My Computer, browse to the lab1 folder (it contains the ball.bmp file)
DO NOT OPEN THE LAB1 folder.
1. Right click the folder (example: lab1 or lab2)
2. Choose Send To...
3. Choose Compressed (Zipped) Folder
You may rename the new zip by right clicking it.
The file name should be yourname-lab1.zip