![]()
![]() R. Craig Collins >
Intro to Computer Graphics >
Levels and Curves
R. Craig Collins >
Intro to Computer Graphics >
Levels and Curves
Levels and Curves © R. Craig Collins, 2008
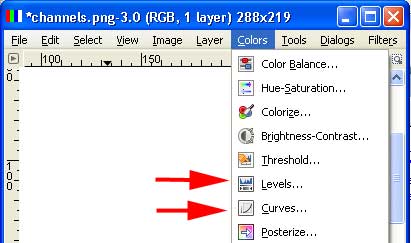
When adjusting brightness or colors, often the slider tools require a lot of experimentation. Some of this experimentation can be avoided by using levels and curves. To access, from the Image window, choose Colors\Levels... or Colors\Curves.
Color Levels. A detailed description of levels is beyond this intro, but, if you open an image such as fireworks against a dark sky, the levels might look something like a series of hills, with perhaps one big hill.
A quick way to get a good start on color balancing the image is with the input levels: drag the left slider to the left side of the main hill, drag the middle slider to the middle of the main hill, and drag the right slider to the right end of the main hill, as below.
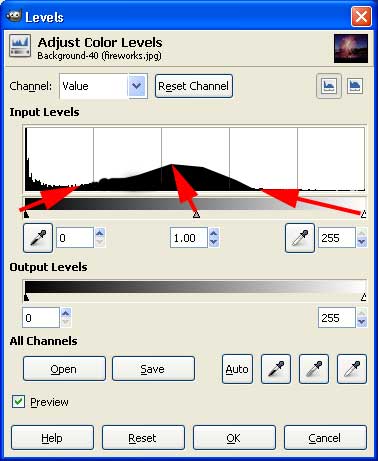
After you use the input sliders to adjust the tonal range, you may drag the output sliders to limit the total tonal range... I would leave this if the hills cover most of the area... the diagram above has a lot of activity on the left... so I would leave the left output slider, and maybe drag the right slider to the first hint of a hill.
You still need to experiment to get the best results, but levels can be a good start... drag the slider and watch the impact on the image. You can even adjust using channels to vary just the red, green, or blue channel.
Color curves. Another way to adjust colors is to use curves. In this case, input and output are represented by the horizontal and the vertical axis. By dragging the line up, you increase the brightness. By dragging down, you decrease the brightness.
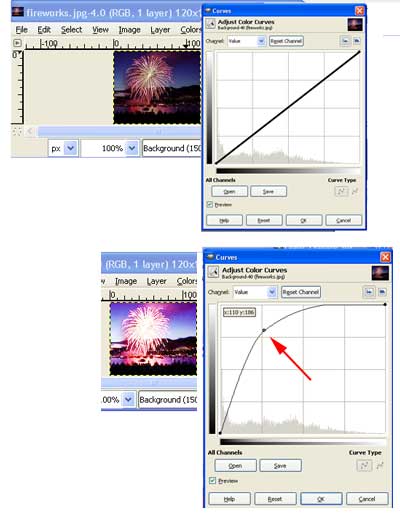
After dragging, you can also let go, and then click another area of the line and drag. Each time you click, you create a Control point, allowing you to vary the results.
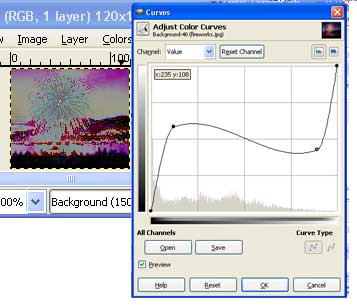
Again, an in depth use of this tool is beyond the scope of this intro, but experiment with it.
Threshold. You might have noticed Threshold when you open the Colors menu (it is also at Layer\Colors\Threshold or Tools\Color Tools depending on your version, etc.) If you scan a book page, you may have lots of shaded areas that are not page white or text black. Threshold remove shades of gray; move the left slider further left until the shades disappear.
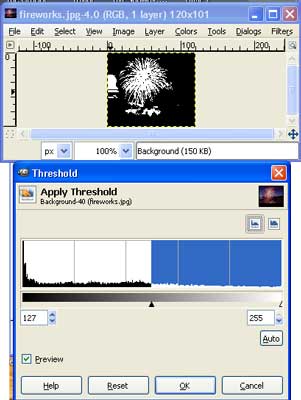
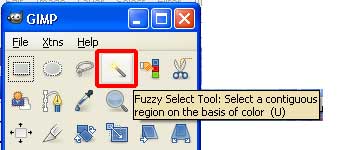
Making masks. A mask is the outline of an area you may wish to make transparent, cut, or edit. A couple of ways to make this mask start with duplicating a layer; then try threshold or curves or levels to really isolate areas in your image. Then use the fuzzy select tool (magic wand tool) to select the region.
In the layer created with the threshold dialog above, we could obviously select the black area to make a mask of the sky, or select the black and then choose Select\Inverse to get a mask of everything that was not black.